 What's this? A suitcase, some 18th c. hats, and a fearsome owl? I must be going somewhere. Guess!
Monday, September 20, 2010
Guess Where I Am?
What's this? A suitcase, some 18th c. hats, and a fearsome owl? I must be going somewhere. Guess!
Thursday, August 26, 2010
Community Colleges Contain Creepers.
I'm just sayin'.
And they took out the Chick-Fil-A that was here! :(
And by the way, ladies (or gentlemen to whom this applies), LEGGINGS ARE NOT PANTS! Ugh.
School started this week for me, so that means I'm off to Virginia Western on Tuesdays and Thursdays and work the rest of the time. My next big, BIG project will involve outfitting the cast of "It's a Wonderful Life" for a high school near my house. I've never made any 1930's clothes, so it should be interesting, and definitely a new experience!
For now, I thought I'd show yall some of the first dresses I ever made. EVER EVER EVER. Like the first three dresses I ever put together.

This is a much, much younger me in the second dress I ever made. Looking back, it was pretty horrible, but I learned so much when I was making it!

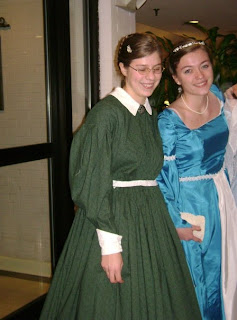
The green 1860s dress my friend Abigail is wearing here was made about the same time as my blue dress. It was pretty accurate, historically, looking back on it, and had a dog-leg closure and the skirt was cartridge-pleated. We both worked on it together, and laughed our faces off when we couldn't figure out why on earth the sleeves looked so funky and wouldn't fit! Thankfully, we discovered we'd stitched them on backwards, and quickly repaired the mistake.
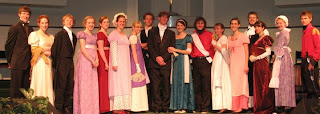 And here, in this picture, the seventh from the right, is the first dress I ever made! I made it just before I started high school. It's a muslin regency dress taken from the Simplicity version of the Sense and Sensibility pattern. It has been altered, and my friend Hilary is wearing it here for a recent production of Pride and Prejudice, in which she played Kitty. The purple open robe (as well as most of the other costumes in this picture) she's wearing over it was made by the fabulous Emily Marsh, whose site you can visit here. (It's really worth taking a look at!)
That's all I've got for now, but I do have three 18th century hats, a 1790 jacket and a new early regency dress I made that I haven't shown you yet, so expect to see it in the next posting! Hope all yall have a good rest of the week and enjoy the weekend!
Friday, August 20, 2010
Courtney's Dress!
 Courtney's dress is finally done, except for the hemming! Construction-wise, it's accurate, however, the gown material is 100% cotton, but the petticoat and the bows on the stomacher are synthetic. Her stays, which I'll get pics of later, are hand sewn with hand sewn eyelets and are made out of thick cotton. Her shift is muslin and is machine sewn and hand-finished. On her pocket, which I'll also get pics of later, I hand embroidered then finished up with the machine; the ties on it are grosgrain ribbon. Her petticoat is synthetic taffeta, and is totally hand sewn as well. The gown itself was hand finished, and I put the lining in by hand. The stomacher is totally handsewn and pins to the stays and gown... we might add hooks and eyes later. Overall, I'm really happy with how everything turned out!


Thursday, August 5, 2010
Free Corset Patterns!
I dug this up the other day on Clare's blog and I thought I'd share it on here too! There are some very nice corset patterns here, including two patterns for 18th c. stays!
Meanwhile, I've finished Courtney's stays, shift, and the embrioidery for a pocket, and yesterday I spent working on her gown! Pics will soon follow, I promise!
Meanwhile, I've finished Courtney's stays, shift, and the embrioidery for a pocket, and yesterday I spent working on her gown! Pics will soon follow, I promise!
Sunday, July 18, 2010
18th Century Clothes for Courtney

Or, my first full 18th c wardrobe commission.
This is my friend Courtney, who asked me to make an 18th century gown and underpinnings for the upcoming home school week at Colonial Williamsburg in September. Last week we met up at the fabric store and plotted out exactly what she wanted! I'm making stays, pockets, a shift, a petticoat and a robe a la anglaise with a stomacher for her. I'm very excited because this is the largest commission I've done so far!

Starting with the stays seemed like the most logical course of action, as they are absolutely necessary before I can take proper measurements for the gown. Courtney asked for back-lacing, half-boned, strapless stays with horizontal boning across the front, similar to the Period Impressions pattern here. In my humble personal opinion, I have found this style of stays to provide a bit more flexibility, which is what Courtney wanted! She chose a thick, natural cotton duck for her stays, and I'll be binding the edges with a blue cotton blend I have in my stash. The pattern was custom drafted to fit her measurements, leaving a gap of 3-4 inches in the back after she laces in. I expect the stays to be finished, except for binding the edges, by Tuesday, and I'll take pictures then so you all can see what I've been working on!
Sunday, July 11, 2010
Purtyfulness, and a Brief History of the Parasol
When I was a little kid, I had the most fantastic red, green, blue, and yellow umbrella. I carried that thing around rain or shine, and pretended on a routine basis that it was a parasol. Last month, I bought my first real parasol, and decided to research their history. 
 During the 18th century, parasols were useful for preventing sunburns or tans. Contrary to the orange fake-bakers of today, pale skin was considered very fashionable and beautiful!

 Essentially, as with any accessory you buy/make to complete your historical outfits, do your research!
  Some more resources on 18th c. parasols can be found here, here, and here! If anyone has anything to add, please let me know in the comments!
During the 18th century, parasols were useful for preventing sunburns or tans. Contrary to the orange fake-bakers of today, pale skin was considered very fashionable and beautiful! Parasol frames were commonly made of wood or whalebone. Overall, the covers were rather simple, without ruffles, lace, or fringe, as seen in the 19th century.
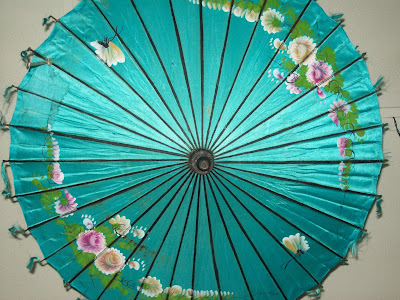
The most common colour for 18th c. parasols was green, as seen in the above image and the 1777 Francisco de Goya painting below.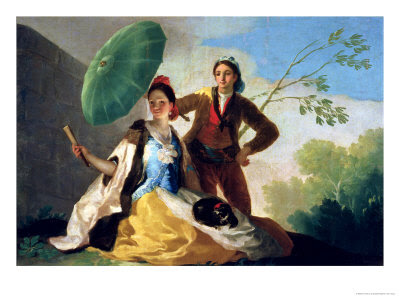
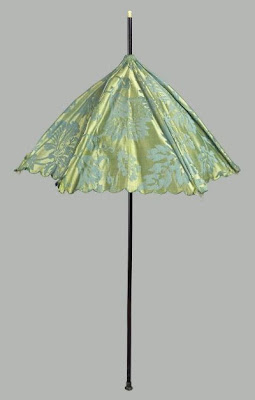 Most 18th c parasols had a height of around 80 cm. The early-mid 1700s parasol pictured above can be seen here at the Boston Museum of Fine Arts, and is 82.3 cm tall.
Most 18th c parasols had a height of around 80 cm. The early-mid 1700s parasol pictured above can be seen here at the Boston Museum of Fine Arts, and is 82.3 cm tall. Parasols for the Historical Costumer
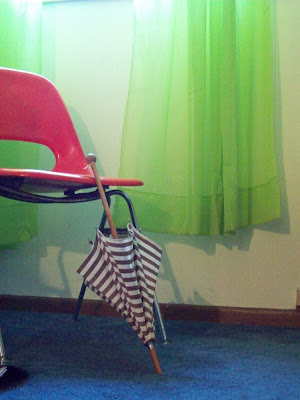
Believe me when I say that there is a small amount of information available about parasols, and I don't know of any books on them. When seeking a parasol to complete your polonaise, your best bet is to buy vintage, but be warned-- many times, parasols can be pricey. The black and white striped parasol I bought yesterday cost me $40 after I'd haggled it down, and the condition is not perfect- the cover is faded to an almost greyish brown stripe and there are a few small holes. However, the frame and spokes (aluminum and wood) are in very good condition, which seems to be the main thing when buying. On the other hand, I bought a vintage 50's blue silk Asian style parasol for $7 and feel like I got a decent deal. So it all depends on where you look and what you find.
Essentially, as with any accessory you buy/make to complete your historical outfits, do your research! Some more resources on 18th c. parasols can be found here, here, and here! If anyone has anything to add, please let me know in the comments!Wednesday, July 7, 2010
How to make a chemise gown that won't make you want to hurt people/won't look like the mumu from hades!
The chemise gown is a tricky thing. So I decided to post a little how-to with tips for making a totally awesome one! If my dear readers have any tricks of their own, I'd love if you left them in the comments below! 


- Step 1: In my humble personal opinion, the key to making your chemise gown look less like a mighty poof of material/your grandmother's curtains is a fitted back. No matter how little or big you are, a little fitting goes a long way. For my gown, I used my standard quarter back pattern that I drafted for my gold polonaise. I lined the back but not the front.
- Step 2: Next, I cut two panels the width of my fabric and stitched them together, then sewed a channel and the top and, using a cord, gathered them to fit the back of my gown. I think that the gathering added just enough poof, which I don't suppose I'd get from pleating. These panels were cut with a slanty hem so I'd have a little train for the skirt.
- Step 3: I attached shoulder pieces to the back, which also formed the arm holes and attached to the front of the gown.
- Step 4: The front is actually just a single, 1-piece panel of material! I stitched a channel in the top, which the blue ribbon is threaded through and comes out through an eyelet I put in the middle. The top of the panel was attached to the shoulder pieces, and the rest of the arm holes were cut out of the first panel. The front and the back were then attached together.
- Step 5: To form the waist, I sewed a channel down the center of my fabric using bias tape and ran cord through it, then made a buttonhole for the cord to come out in the center front. The channel starts at the 'waist' of the back and continues up to the center front waist, arching up just slightly, as you can see from the picture.
- Step 6: Add your sleeves of choice! Instead of a more fitted sleeve, I made poofy ones, similar to the ones on my shift.
- Step 7: Use the cord and the ribbon to gather the front! :D
- Step 7: Hem it, trim it, and wear it! A sash and a GREAT hat (with feathers, ribbons, etc.) complete the awesomeness.
Subscribe to:
Posts (Atom)
