oh, hello there!

Sunday, July 11, 2010

Purtyfulness, and a Brief History of the Parasol

When I was a little kid, I had the most fantastic red, green, blue, and yellow umbrella. I carried that thing around rain or shine, and pretended on a routine basis that it was a parasol. Last month, I bought my first real parasol, and decided to research their history. During the 18th century, parasols were useful for preventing sunburns or tans. Contrary to the orange fake-bakers of today, pale skin was considered very fashionable and beautiful!

Parasol frames were commonly made of wood or whalebone. Overall, the covers were rather simple, without ruffles, lace, or fringe, as seen in the 19th century.

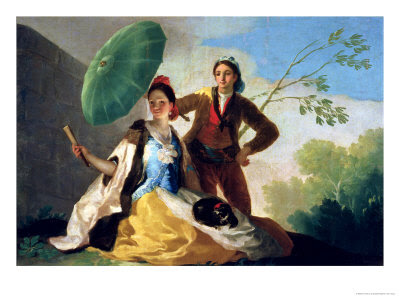
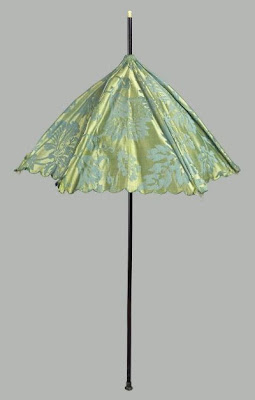
The most common colour for 18th c. parasols was green, as seen in the above image and the 1777 Francisco de Goya painting below. Most 18th c parasols had a height of around 80 cm. The early-mid 1700s parasol pictured above can be seen here at the Boston Museum of Fine Arts, and is 82.3 cm tall.
Parasols for the Historical Costumer

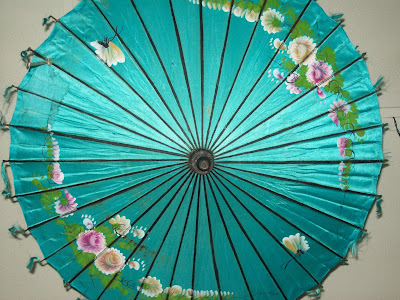
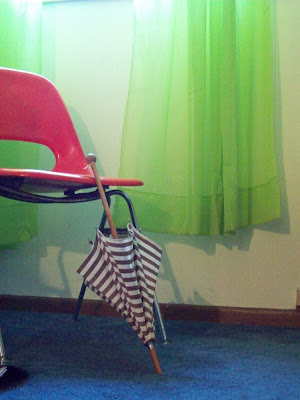
Believe me when I say that there is a small amount of information available about parasols, and I don't know of any books on them. When seeking a parasol to complete your polonaise, your best bet is to buy vintage, but be warned-- many times, parasols can be pricey. The black and white striped parasol I bought yesterday cost me $40 after I'd haggled it down, and the condition is not perfect- the cover is faded to an almost greyish brown stripe and there are a few small holes. However, the frame and spokes (aluminum and wood) are in very good condition, which seems to be the main thing when buying. On the other hand, I bought a vintage 50's blue silk Asian style parasol for $7 and feel like I got a decent deal. So it all depends on where you look and what you find.
Essentially, as with any accessory you buy/make to complete your historical outfits, do your research! Some more resources on 18th c. parasols can be found here, here, and here! If anyone has anything to add, please let me know in the comments!
Wednesday, July 7, 2010

How to make a chemise gown that won't make you want to hurt people/won't look like the mumu from hades!

The chemise gown is a tricky thing. So I decided to post a little how-to with tips for making a totally awesome one! If my dear readers have any tricks of their own, I'd love if you left them in the comments below!

  • Step 1: In my humble personal opinion, the key to making your chemise gown look less like a mighty poof of material/your grandmother's curtains is a fitted back. No matter how little or big you are, a little fitting goes a long way. For my gown, I used my standard quarter back pattern that I drafted for my gold polonaise. I lined the back but not the front.
  • Step 2: Next, I cut two panels the width of my fabric and stitched them together, then sewed a channel and the top and, using a cord, gathered them to fit the back of my gown. I think that the gathering added just enough poof, which I don't suppose I'd get from pleating. These panels were cut with a slanty hem so I'd have a little train for the skirt.

  • Step 3: I attached shoulder pieces to the back, which also formed the arm holes and attached to the front of the gown.
  • Step 4: The front is actually just a single, 1-piece panel of material! I stitched a channel in the top, which the blue ribbon is threaded through and comes out through an eyelet I put in the middle. The top of the panel was attached to the shoulder pieces, and the rest of the arm holes were cut out of the first panel. The front and the back were then attached together.

  • Step 5: To form the waist, I sewed a channel down the center of my fabric using bias tape and ran cord through it, then made a buttonhole for the cord to come out in the center front. The channel starts at the 'waist' of the back and continues up to the center front waist, arching up just slightly, as you can see from the picture.
  • Step 6: Add your sleeves of choice! Instead of a more fitted sleeve, I made poofy ones, similar to the ones on my shift.

  • Step 7: Use the cord and the ribbon to gather the front! :D


  • Step 7: Hem it, trim it, and wear it! A sash and a GREAT hat (with feathers, ribbons, etc.) complete the awesomeness.

Tuesday, July 6, 2010

Coming Soon


How to make a chemise gown that won't make you want to hurt people/won't look like the mumu from hades!

Coming very, very soon, and with pictures!

Sunday, June 27, 2010

Think I Might Win?


I entered my blue open robe Jo Ann's Prom 2010 contest. The top prize is a scholarship, which would be fantastic, seeing as I'm off to college next year! I thought I'd enter it, fully knowing it's not what most people were wearing to prom. Although it is a natiowide contest, not many teenagers sew. Do you ladies think I might have a chance anyway?

Purtyfulness!


I was browsing about the internet this afternoon and ran across these lovelies at Modcloth! So if any of you feel the sudden need to carry your 18th century madness out into the realm of everyday, hip clothing, I'm sure these would do the trick! You can find them here!
Oh, the chemise gown is essentially done exepct for the hem, but that's for another post!

Sunday, May 30, 2010

My 1790s Chemise Gown and Blue Silk Open Robe


Or, the biggest pain in the rear ever. ever. Who knew it would take so many tries to figure out the draping of the open robe?! That being said, this is one of my favorite gowns, and the flow-y train (which I pinned up for the dance) and the thin chemise gown are just lovely to wear. I'm wearing over it my regency short stays (pics to come) and my regency petticoat. I debated on selling it, but i don't know if I can bear to part with it now! I'll definately be wearing it again, possibly for my senior pictures. :D

The Red and White Gown


I know, I know. I'm a horrible blogger. I ramble and my posts are few and far between. So I am updating now!


I've started a new pair of stays that just need the eyelets stitched and the edges bound. Hooray! Plus, I've made a red and white striped gown to wear to our trip to Williamsburg this September, and I'm very, very happy with it!


My next project will probably be a chemise/gaulle gown. :D